Create a bootable SD card for beaglebone black using Gparted (graphical)

In this tutorial, we will be learning how to create a bootable SD card for the beaglebone black board. I will be using Ubuntu 22.04 for this tutorial and gparted application for partitioning the SD card. You can choose any size above 8gb for the SD card. Here I will be using a 32gb SD card for this tutorial.
1. Connect the micro SD card to the PC using any card reader.
2. Check if it's detected by either using the sudo dmesg command or the lsblk command.
$ lsblk
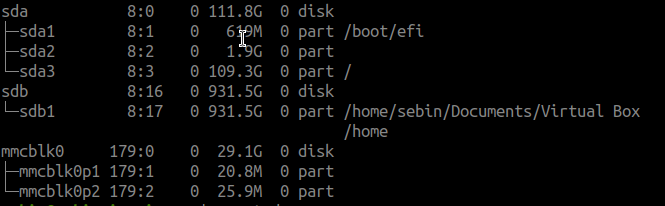 As you can see, my SD card is detected and is the mmcblk0 device. There are already two partitions existing on this device, but no worries as we will remove all existing partitions and create new ones from scratch.
If the name of your SD card is also different from mine, it is also common for sd cards to have different names.
3. Launch the gparted application.
You can launch the gparted application in Ubuntu from either the all applications menu or typing gparted in a terminal.
If you haven't installed gparted, install it using the following command sudo apt-get install gparted
4. Delete all existing partitions in the SD card using gparted
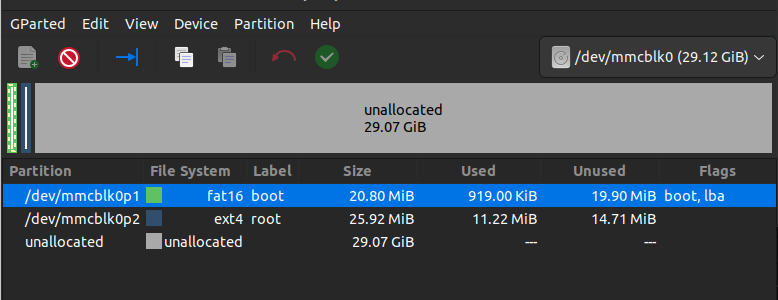
As you can see, there are 2 partitions in my sd card called mmcblk0p1 and mmcblk0p2. In your drive, find similar partitions and delete one by one. In order to delete the partitions, right click on the partitions and select the delete option. Also, after deleting all partitions, make sure to click on the green tick mark to write all the changes.
 Click on the green tick mark to make sure you write all the changes that you made until now.
5. Create 2 partitions called BOOT and ROOT
Now with the help of gparted application, we will be creating two partitions in our SD card. The first partition is a FAT16 partition (256mb size) and the second partition will be of EXT4 format (any size greater than 4gb is enough).
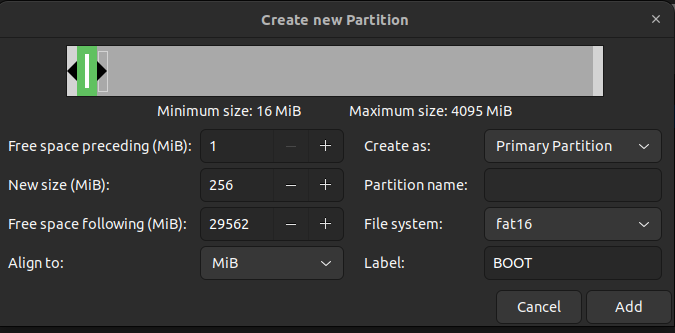
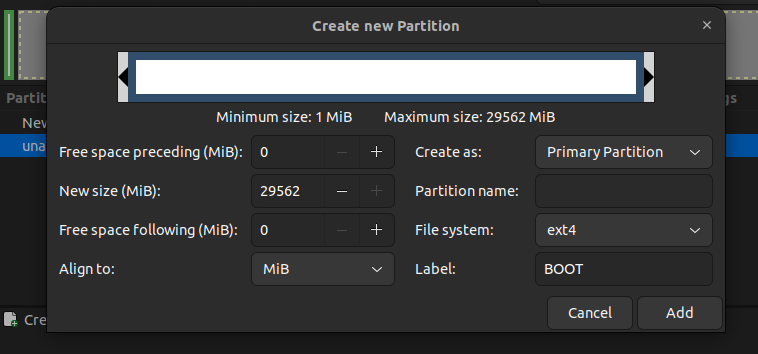
- Creating the BOOT (FAT16) Partition
In order to create a new partition, right click on the unallocated space and select new option. A new window will pop up asking the required parameters
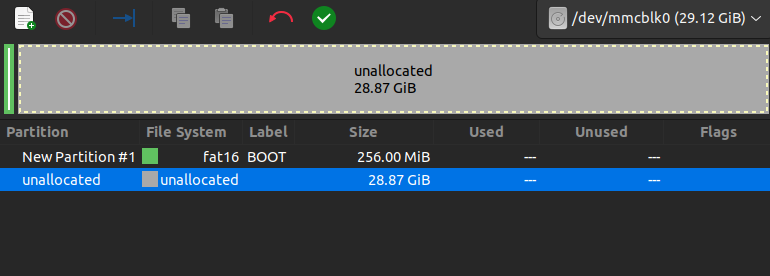
 After adding the new fat16 partition, the resulting window would look like this
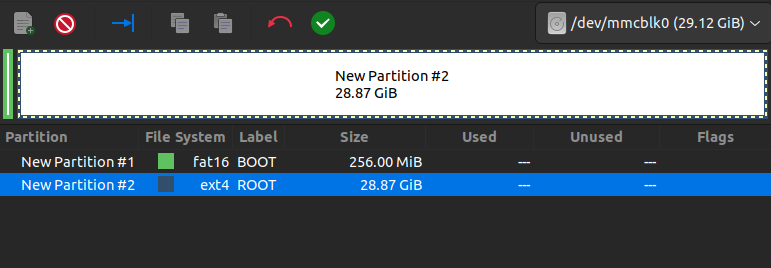
- Creating the ROOT (ext4) Partition We will create the ROOT partition with the remaining free space available. Right click the unallocated free space to create the ROOT partition and select the follwoing configurations.
We have now created the required partitions and this is what the gparted window should look like after all these steps.
In order to finalize the changes, click on the green tick mark to write the changes.
6. Enable boot and lba flags in the BOOT partition
This is the final step and you should enable 2 flags to make the BOOT partition actually bootable. So to do that, right click on the BOOT partition and click on manage flags option.
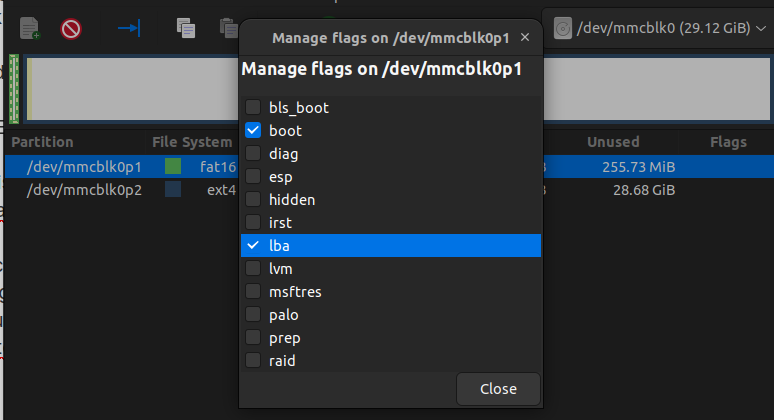
If you can't click on the manage flags option, then you probably didnt write the changes from the previous steps. Click on the green tick mark icon to write the changes to the SD card and again look for the manage flags option.
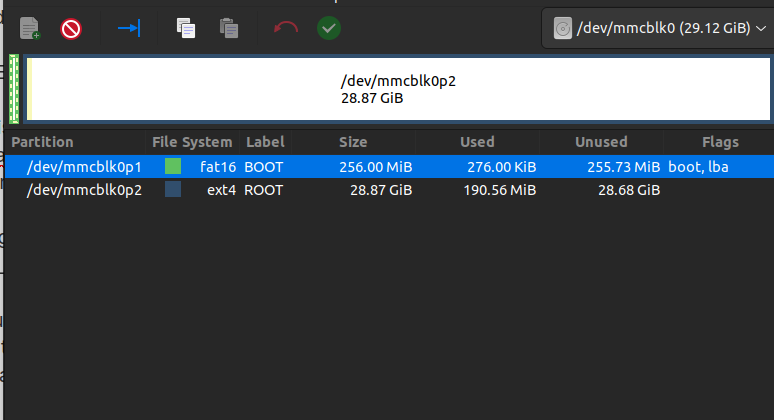
This is the final state in the gparted partition and how your drive should look like. If it doesnt look similar, repeat the above steps to make it correct.
Summary
In this tutorial, you learned to create partitions in gparted tool to create a bootable SD card for the beaglebone black board. In the next tutorial, we will learn to copy the required contents into the SD card and will boot from the SD card.


